Most homeowners are absolutely delighted when they pull up old carpets and discover original pine wooden floorboards hiding underneath. If you live in a Victorian or Edwardian terrace house in London, finding these period features feels like striking gold. However, what starts out as an exciting discovery doesn’t always automatically lead to the dream floor that property owners expect.
#CraftedForLife
When weighing restoring old pine floorboards pros and cons, it helps to look at the history of how these boards were made and originally used. Understanding the reality behind the rustic aesthetic can save you time, money, and disappointment.
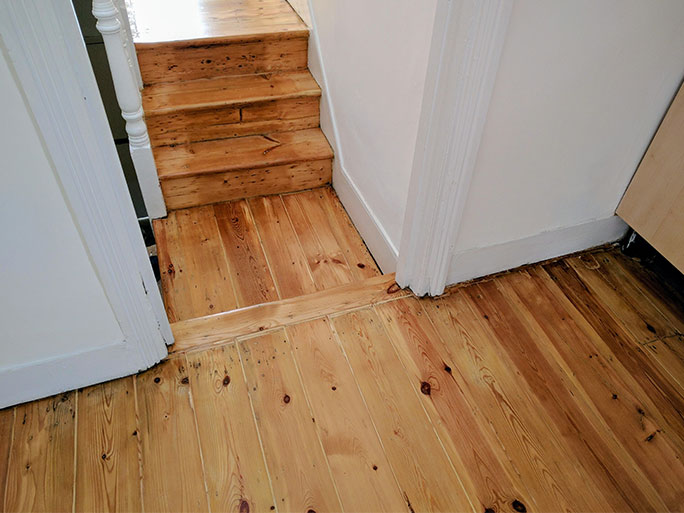
A renovated rustic look pine victorian floor with gaps filled with pine slivers, in the hallway with the steps, oiled clear satin
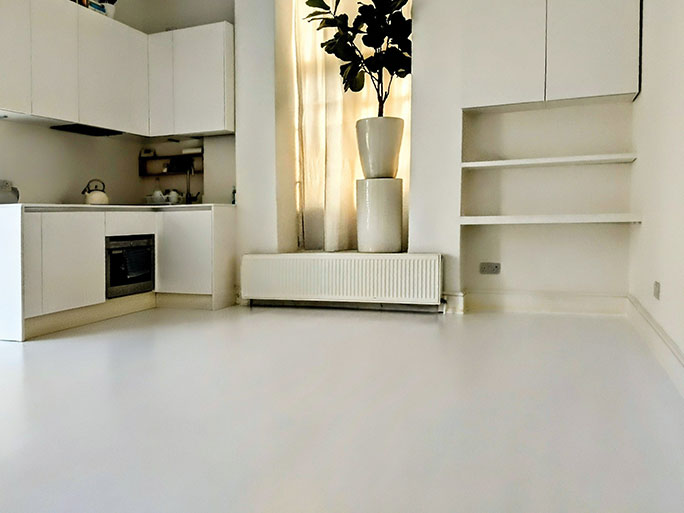
A modern kitchen featuring tradition pine floorboards sanded, gap filling and painted white that hide wood knots and marks creating a clean seamless look
The Reality of Original Pine Floorboards: Are They Worth Saving?
The use of pine as a flooring material exploded during the industrial revolution due to the development of steam power, which was used to power the saw mills. Concrete wasn’t widely available at that time, so the wood, which was used close to ‘green’ as it wasn’t given enough time to dry properly, was also used to make the joists for the subfloor. For the early pine floors tongue and groove was not an option. The side matcher hadn’t been invented until 1885 and the end matcher in 1898 to enable mechanically cutting the tongue and groove profiles. So instead the pine floorboards were nailed to the joists with iron clasp nails. These were used as the blunt ends didn’t cause the wood to split.
To evaluate if the original pine floorboards are worth saving, we have to address their original purpose. In mid-to-late 19th-century properties, these softwood planks were never actually intended to be the finished, visible floor. They were merely installed as a practical, economical sub-flooring material designed to be covered by heavy rugs, carpets and later on linoleum.
Because they were hidden away, builders didn't select them for their beauty. Over generations of use, these subfloors have encountered a fair share of wear. Before deciding on professional pine floor restoration, you must also consider the structural quirks that come with a 150-year-old softwood.
Rusty Iron Nails: Over time, the structural iron nails holding the planks down are highly prone to rusting. This rust bleeds into the surrounding timber, creating permanent dark staining in the wood fibers.
The Infamous Edge Tar: It was very common to paint the outer edges of room perimeters with thick black tar or bitumen to protect the wood from dampness or rot. Removing tar from the edge of wooden floors requires extensive work, and the black residue often penetrates deep into the grain.
Softwood Vulnerability: Pine is a softwood, meaning it marks, dents, and scratches far more easily than a hardwood like oak. If you have a busy home with children, pets, or heavy furniture (like a grand piano), a pine floor will quickly collect deep character marks.
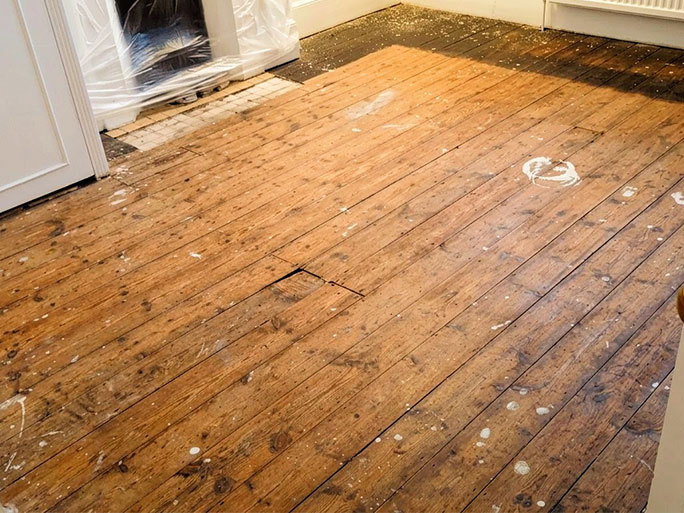
Old pine floorboards before restoration showing dark black bitumen or tar stains around the edges of the room at the ends of the boards.
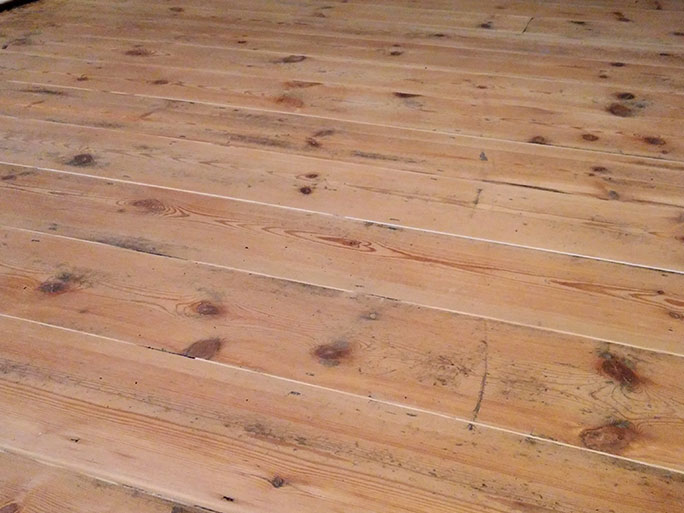
Close-up of sanded pine floorboards showing natural imperfections, dark wood knots, grain variations, and deeply embedded marks that cannot be completely removed.

How to Fill Gaps in Old Pine Floorboards (And Why We Don't Recommend It)
Because original boards are loosely suspended over joists, they naturally expand and contract as humidity levels change throughout the seasons. This movement leads to noticeable gaps between the planks. These openings allow drafts to seep up from the space under, resulting in a cold, drafty room.
When exploring how to fill gaps in old pine floorboards we usually look at three primary methods, though each comes with distinct problems with original pine floorboards:
Resin & Sanding Dust Paste: This common method involves mixing fine sanding dust (sawdust) with a specialized resin paste and spreading it into the cracks. The flaw here is that the resin sets rock-hard. Because it cannot flex with the natural shifting of the wood, the boards squash or split the filler when they expand or flex. The hardened paste eventually cracks and falls out, making it a poor long-term solution.
Wood slivers: This method involves driving thin, wedge-shaped pieces of timber into the gaps using PVA glue. While using wood slivers to fill floorboard gaps looks great initially, these ultra-thin slivers are highly prone to splitting, cracking, and generating sharp splinters underfoot over time.
Flexible acrylic fillers: An elastic, colour-matched wood flooring acrylic filler is the best alternative to the traditional methods. It stretches and contracts with the wood, typically lasting around three years before requiring a touch-up.
Our recommendation: In most cases, if you want a reliable result, the best course of action is to leave the gaps exactly as they are. This gives the timber ample space to breathe and move naturally. If the drafts are too severe, it may be time to consider modern alternatives.
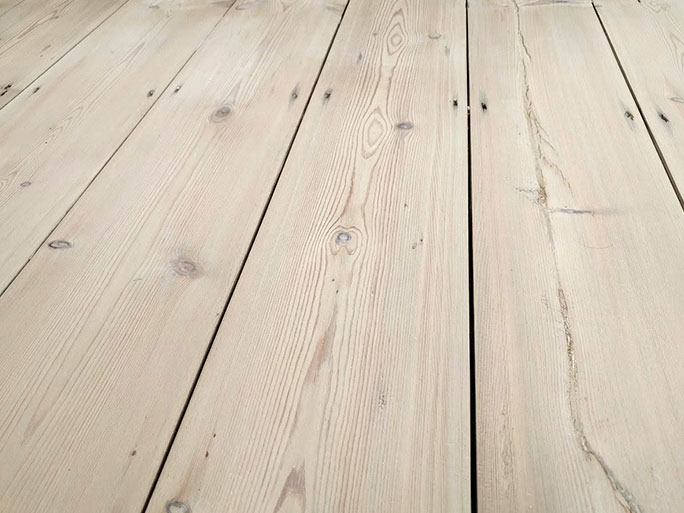
Lightly sanded pine floorboards with visible expansion gaps running between the planks, showing the natural wood grain and knots.
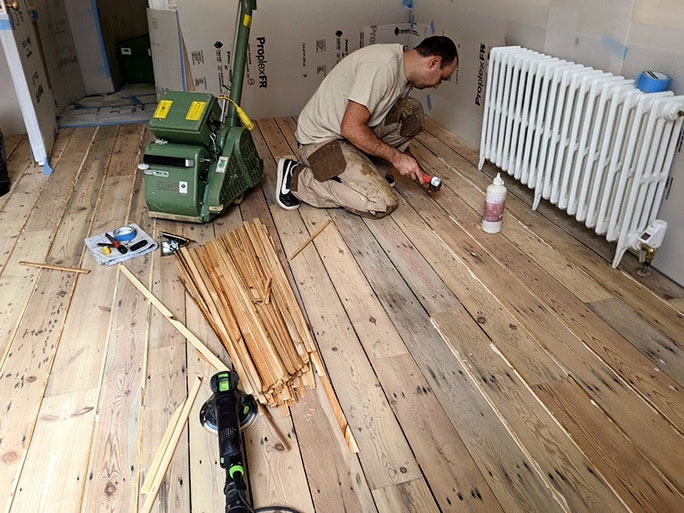
A flooring professional filling gaps in old pine floorboards by wedging wooden pine slivers between the planks in preparation for sanding and oil finishing the floor
Repairing and sanding original victorian pine floorboards
Before any heavy machinery touches the timber, strategic repair work is almost always necessary. If sections of your floor are broken or have been aggressively cut through by past plumbers or electricians, those sections will need to be replaced. For a cohesive look, we highly recommend sourcing reclaimed Victorian pine floorboards so the replacement timber naturally matches the age and grain of the rest of the room.
When it comes to sanding original floorboards, caution is essential. A deep sand is necessary to cut through century-old grime, edge tar and dents. However, pine is a soft wood. Every pass of a drum sander reduces the thickness of the board, directly impacting its structural integrity.
To prevent the wood from weakening—ensuring it can still support heavy furniture—we recommend removing a maximum of 2mm to 3mm from the surface. If a floor has already been sanded down it may simply not have enough thickness left to survive another deep restoration.
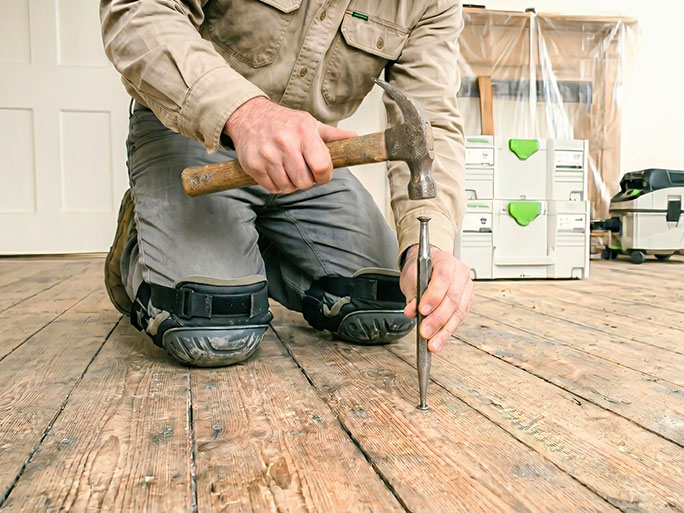
Flooring specialist carries out nail punching to counter-sink clasp nail heads below the surface of pine floorboards before sanding; this can cause vibration in the ceiling below
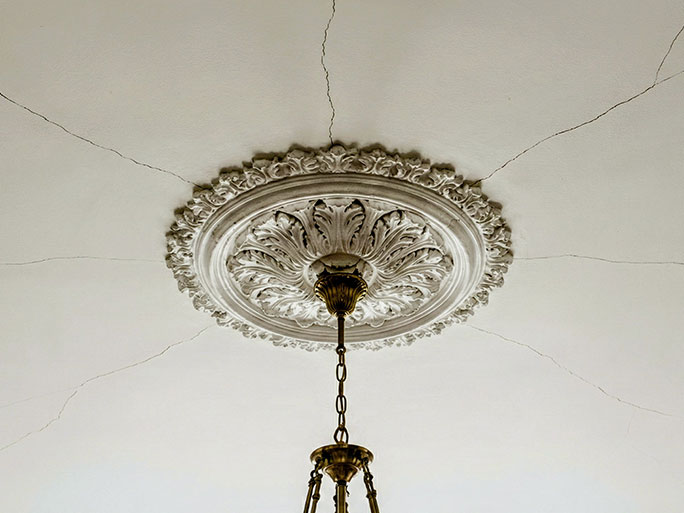
A lath and plaster ceiling showing visible cracks caused by vibration from nail punching on the pine floorboards above.
Nail punching is a critical, non-negotiable stage of the preparation process. It can be tempting to skip this tedious task, but leaving nail heads exposed poses a severe fire hazard, as contact with the sanding machine creates sparks that can ignite the dust bag. Additionally, the sander will grind flush nails into shiny metallic spots that ruin the final finish.
When working on upper floors, however, the nail punching must be executed with caution. The impact of hammering sends vibrations through the joists that can easily crack or dislodge the lath-and-plaster or plasterboard ceiling directly below.
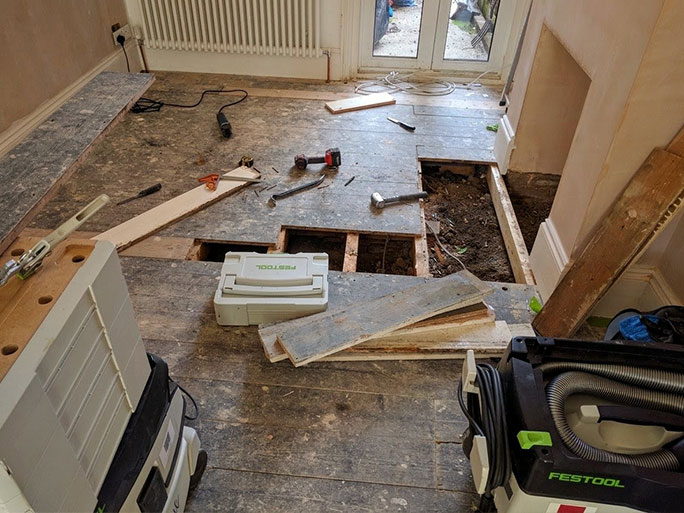
Damaged pine floorboards being removed during a floor restoration project to be replaced with reclaimed matching planks while exposing the underlying joists and dirt subfloor
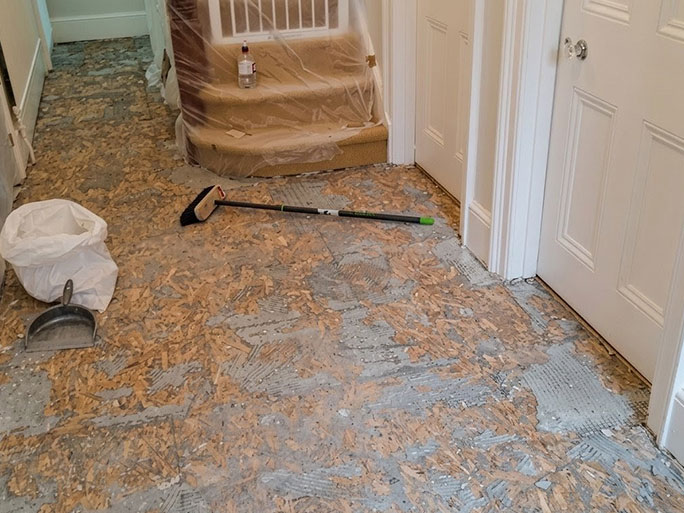
A hallway floor undergoing renovation, showing old plywood underlayment and adhesive residue being removed to expose original pine floorboards beneath
How to Approach Sanding Pine Floorboards
When sanding old pine floorboards, a deep and thorough sand is usually required to erase decades of ground-in dirt, rusty nail stains , and the stubborn black tar around the edges.
However, because pine is a softwood, removing too much wood will weaken the structural integrity of the floor. For the safest and most effective pine floor restoration, we recommend removing a maximum of 2mm to 3mm of wood. This careful depth ensures you retain the floor’s weight-bearing strength while revealing a beautiful, authentic rustic look, even if some deeply ingrained historical stains remain.
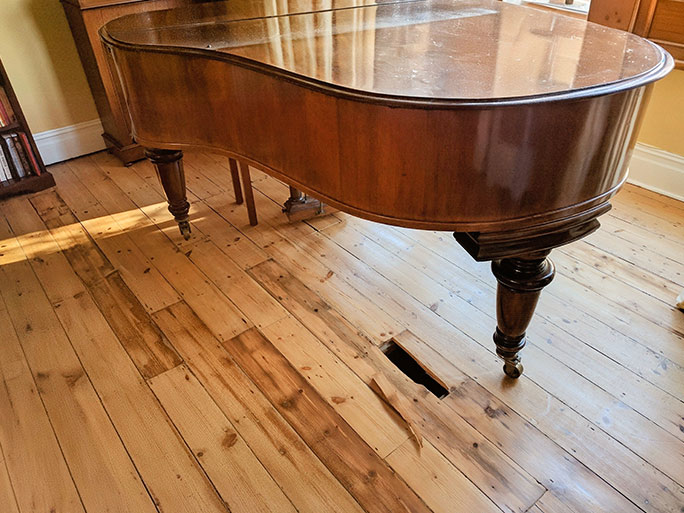
Under the heavy weight of the grand piano the old pine floorboards that were thinned and weakened due to repeated sanding broke and splintered
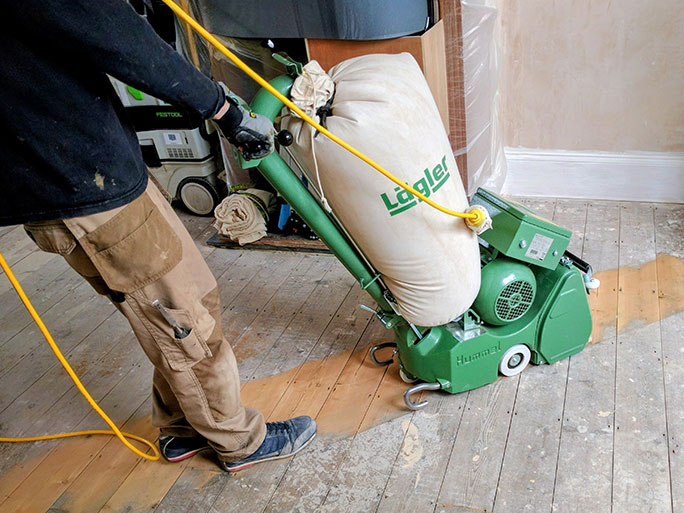
Using a Lägler Hummel belt sander the wood floor specialist starts sanding the pine floorboards to remove old dirt and finish, revealing the clean, light wood surface beneath.
Can You Stain or Paint Pine Wood Floors?
Once the floor is clean and flat, you have a few options for finishing, depending on your preferred style:
Natural Oils & Lacquers: Hardwax oils (like Osmo Polyx-Oil) and lacquers protect the wood beautifully. Clear oils will bring out a warm, golden tone, while white-tinted oils or a lye treatment can create a beautiful, muted Scandinavian look.
Staining: Wood stains can successfully alter the colour of pine, allowing you to mimic richer tones, though the softwood will absorb stains unevenly around knots.
Floor Paint: If your original floorboards have excessive blemishes, deep tar stains, or mismatched replacement planks, applying a high-quality floor paint (such as Farrow & Ball) is an exceptional alternative. A robust floor paint covers up visual flaws while retaining the beautiful, physical textures of the period wood planks.
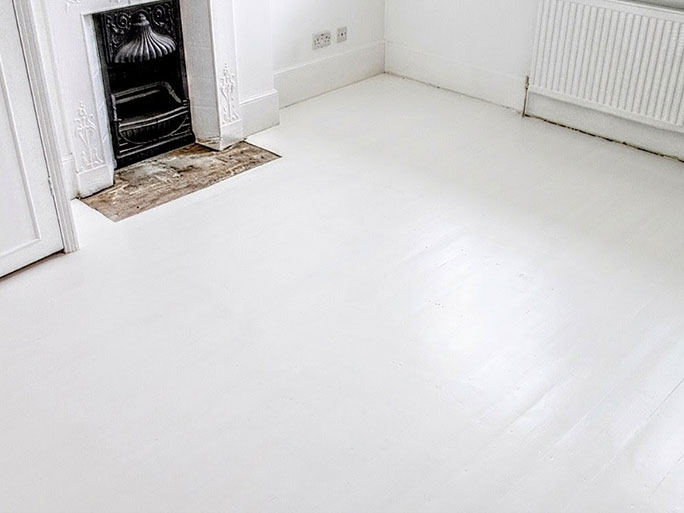
A bright room featuring old pine floorboards painted entirely white, creating a clean look next to an original black cast iron fireplace
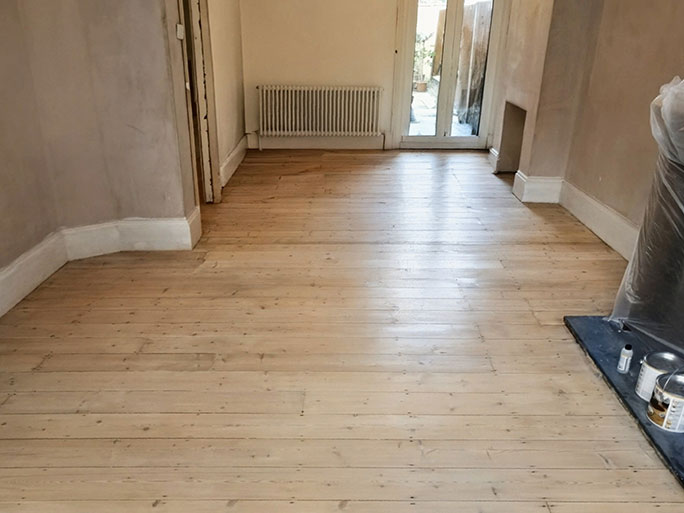
Restored pine floorboards sealed with white wood oil, allowing the natural wood grain and knots to remain subtly visible across the room
Final Verdict: Is It Worth Restoring Your Pine Floors?
Ultimately, deciding whether original pine floor restoration is worth the investment comes down to managing expectations:
Choose restoration if: You adore a shabby-chic, rustic, or hyper-traditional character look and don’t mind the odd splinter or the winter draft. You must be completely at peace with natural imperfections, gaps, dents, and a floor that looks explicitly aged and authentic.
Avoid restoration if: Your ultimate goal is a smooth, flat, draft-free, splinter-free floor that resembles a pristine modern finish. If you try to force old pine subfloors to meet the exact standards of a brand-new hardwood installation, you are likely to be disappointed.
For property owners seeking a comfortable, long-lasting surface with no drafts, the cost of extensive timber repairs, gap filling, and deep sanding often overtakes the cost of installing a brand-new, level engineered oak floor built to last for generations.
Unsure if your London property’s subfloor is ready for a revamp? Contact Fin Wood today to book a comprehensive site consultation for your period property floor sanding or installation project.
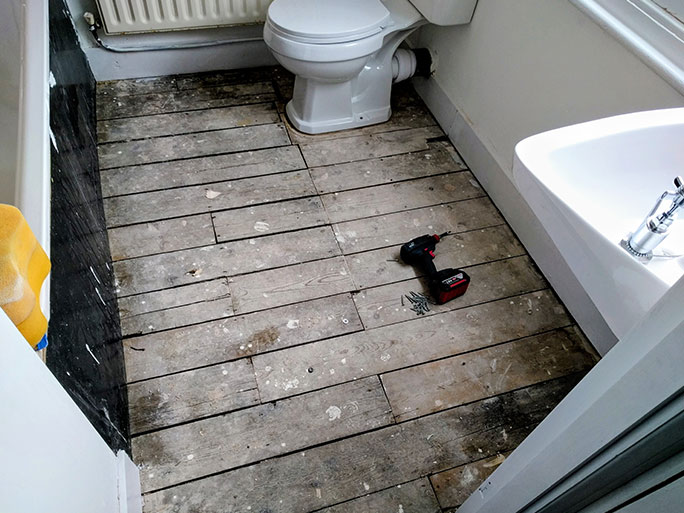
An old, weathered bathroom pine floor before restoration, showing stained, graying floorboards
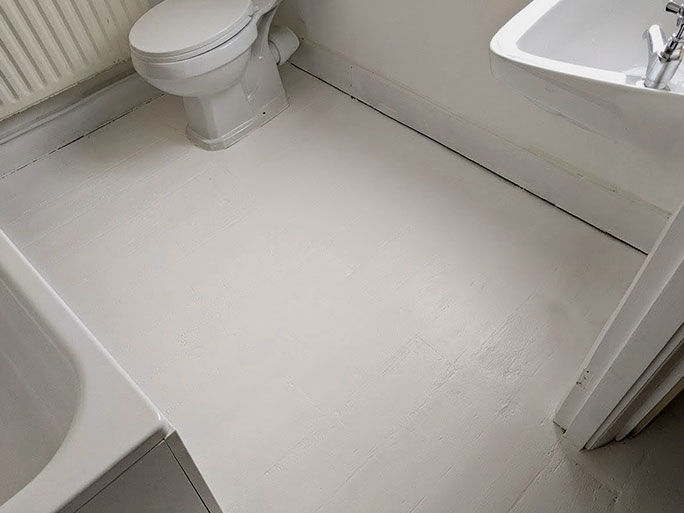
The completed bathroom floor restoration, showing the original pine floorboards painted with a solid, clean coat of white floor paint

Book now