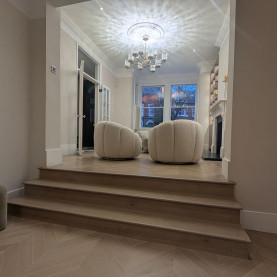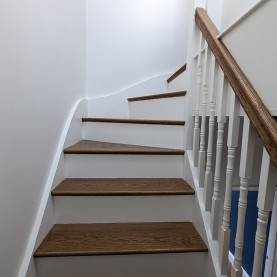

Stair Cladding - Modern look
Stair Cladding - Modern look: the modern cladded stairs look solid and pure. They possess a strong sculptural quality and have a very commanding presence in the overall design. These stairs, as beautiful as they are,...


With more time at home during lockdown, many people decided to tackle long-needed home improvements and some have even attempted ambitious DIY projects, with varying degrees of success. Lockdown has gladly given many of us the opportunity to undertake projects and learn new skills. DIY home improvement kits of all sorts have become hugely popular including ‘stair cladding kits’ claiming to help you transform your staircase in just one day!
Staircases are well used and often a key design feature of our homes. And more and more people are interested in improving old, tired carpeted staircases. Retailers are keen to provide flat pack solutions, pitched as weekend DIY projects. These stair cladding kits consist of solid wood, wood veneer or laminate staircase parts. The kits include pre-cut, pre-finished treads, risers and side covers. They are marketed as being ready to glue to your existing staircase for an easy home makeover in a few simple steps. For just a few hundred pounds these kits are very tempting for customers looking for an affordable and stylish option.
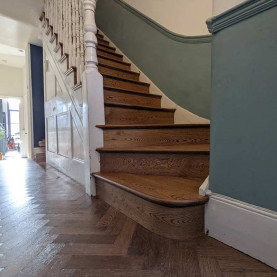
The reality is that most British homes have stairs not suitable for pre-made kits. Older homes have old weak structures and staircases need strengthening before cladding. Most steps are not the same height or width making it difficult to accurately measure and order pre-cut pieces. We often find treads and risers no longer fit at a square angle and the sides of the steps are bent or curved. Once you get started you will need to make many cuts and alterations to fit your staircase. The kit may be a huge cost saver initially, but after much frustration and wasted time you may need to hire a professional to assist.


We know a fundamental stage of stair cladding is preparing and strengthening the structure. One manufacturer recommends the existing surface is cleaned and dust free before fitting. But it is critical that before you start to clad the stairs the structure is strengthened and this is not included in DIY flat pack instructions. We carefully secure treads to prevent trip hazards and avoid creaky steps. Remember with a flat pack kit is the responsibility of the fitter (you) to make sure the steps stay in place. It could easily lead to a terrible accident if someone slips and falls on loose tread or risers.
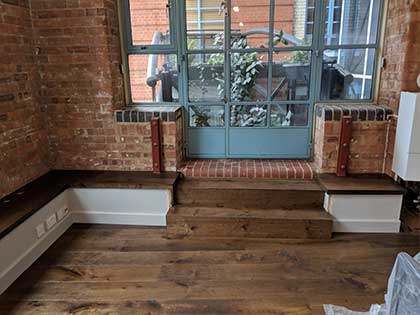
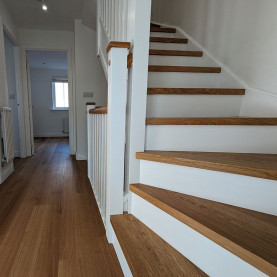
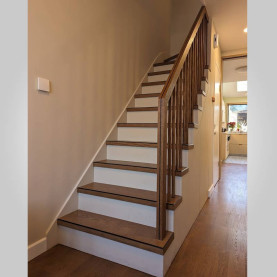
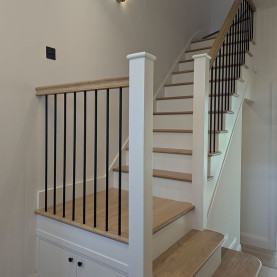
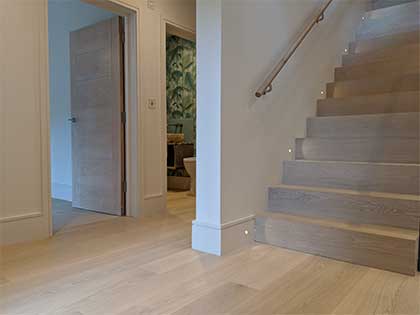
Stair cladding is not an easy task, it takes skill and craftsmanship to expertly clad the steps and seamlessly integrate the stairs with the floor. Some people can afford the luxury of a tailored bespoke staircase made in a workshop and expertly fitted on-site. This is usually part of a new build project as it is often featured on home improvement shows for example Grand Designs etc. In an existing home replacing the staircase can consume up to 50% of the total refurb budget.
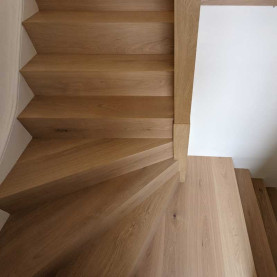
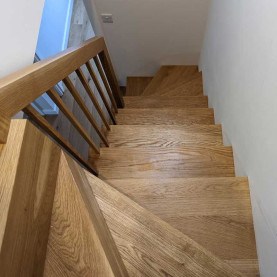
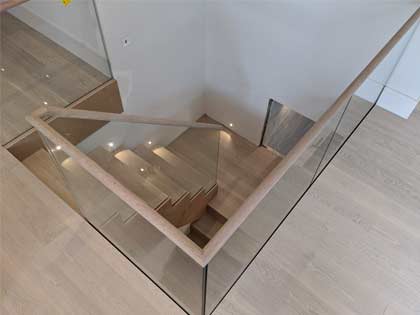
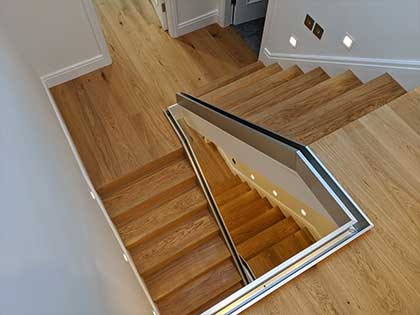
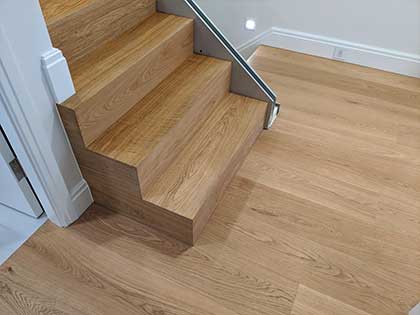
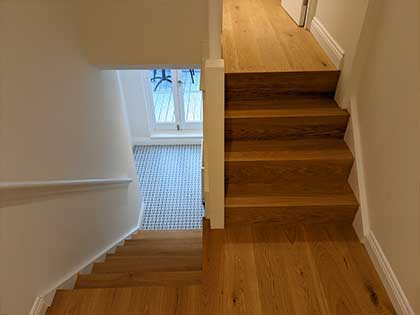
In most cases we manufacture on site bespoke stairs elements, nosings, threads and risers out of the chosen flooring boards to ensure a professional integrated finish. Such attention to detail requires experience and craftsmanship. These high quality seamless stairs are known in the trade as waterfall stairs and this has become our standard service. We delight in cladding stairs of all kinds with beautiful results.


We checked customer reviews for some of the top stair cladding kits and found the comments revealed the reality of these home makeover solutions, specifically the frustration and additional cost.


Finally got round to putting on stairs. Took 5hrs to fit 3 steps, followed the instructions and watched youtube but stairs must be completely level and mine weren't. Easy to fit... load of rubbish had to trim the lip of the riser away and insert wedges at bottom of riser to make sure there were no gaps. To make them stay in place I ended up having to nail it into place or I would have had to shave each step manually. No instructions on how to connect top step tread to new laminate either so had to improvise. Not worth the hassle, arguments or money.
Don't buy this
Just opened the packaging to fit this and the shade variations are so bad, it is going to look stupid if we put this down. I accept there will be some shade variation, but this is crazy. Have a look for yourself, the contrast on the left and right is typical. Do you see how dark it is in comparison to the treads behind them?
This product is very poor
The extension doesn't fit properly into the stair. It needs to be sanded down to fit. The extension is of a slightly different thickness to the stair so it doesn't sit flush. Don't use this for your stairs.
Be prepared for a lot of cuts...
Good value for money engineered oak faced treads and risers.
As the treads are 1000 x 300 be prepared for a lot of cutting for a standard (250) staircase.
A few are a bit odd looking (depending on the section of the tree), and one had to go back as badly marked in the plastic packaging (box perfect, so no marks for QC team.
Overall decent look for the money once slogged all the cuts. My stairs look great but not so easy to put it down as it looks on the video ;)
Looks gorgeous but not as easy as suggested
I must say that the finished job does indeed look fantastic, however getting there was not as easy as is suggested by the manufacturer.
It may be that my stairs are 'not standard' as every tread had to be cut on its depth & length. This took some fine adjustment of my circular saw to ensure a nice clean straight cut along the length.
All the risers had to be raised by 4mm as they were lower than the height of the existing risers and this meant that a 2mm gap was visible between the tread and the riser when in position. Thankfully the treads being good quality 12mm thickness they covered the spacers once in position. In all, it took longer than expected and was not as easy as expected, but was worth it for me.
Stair overlay kits - things to watch out for
It's worth noting that on older stairs the treads tend to 'dip' in the middle as a result of years of wear so the riser [if cut straight!] will show a gap where the tread dips. This means you'll need to scribe the riser in or fit a cover strip to close the gap.
Next... if you have anything other than straight, even steps you'll be fine, if however, like on many stairs you have a single or double curved bottom step you'll need to be able to make up a tread yourself!
In summary...£350 for a set of oak stairs you can't complain - but you'll need to have some skills and some woodworking kit to get a decent outcome.
Very attractive, but no instructions!
We bought this stair cladding kit for just one step, to match our oak flooring. It's well made and attractive. However the pack contained no fitting instructions, other than a few sketchy photos on the box. There is a video on the maker's website, but this is aimed at professional fitters. It says to cut the riser and tread "to the required size", but does not explain how that should be calculated. Diagrams and pictures are not sufficiently clear or self-explanatory and it doesn't give a clear explanation of how it should fit together. Consequently, we misunderstood the height of the riser and cut it to fit underneath, rather than flush with the top. We had to buy a second kit, because the riser was spoiled.
Now that it's finished it looks great, but it costs twice as much, because of poor instructions. DIY kits should not assume professional knowledge as even experienced DIYers need to understand how something works.
Please sign in first.
Sign in