Chevron flooring
Chevron flooring: engineered or solid, chevron flooring (known as Hungarian point) used wooden battens cut at various angles. A true classic European pattern. The angle difference changes the way the light reflects...


For this project, in a lovely Victorian terraced home in London, we replaced the old carpets with a beautiful unsealed chevron parquet engineered wooden floor, which was fitted with a single row border. The wood was then sealed with a dark ebony oil. The new hardwood flooring was installed in four bedrooms, the upper hall and the landings and the stairs were then clad in matching hardwood oak to connect the surfaces together. This was a tricky project, as is often the case in older properties, the walls were uneven which had an impact on the symmetry of the chevron design. We also had the challenge of continuing the herringbone pattern between the different levels.
![]()
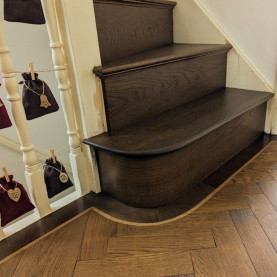
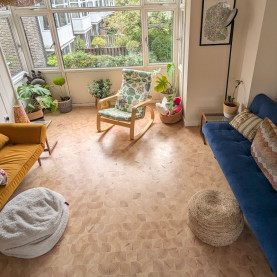
The dark chevron parquet floor looks like it’s original to the house

The floor fits neatly under the stair spindles
Our work began by removing the old carpets and preparing the subfloor. A good quality ply was fixed into place, as it is always important to have a sound, flat surface to which to fix the chevron parquet wood flooring. Fitting this floor involved lots of different cuts, to ensure the line of the chevron parquet was straight and to allow for the smaller runs of wood in the narrow hallway and landing. We used precise cuts to minimise waste.
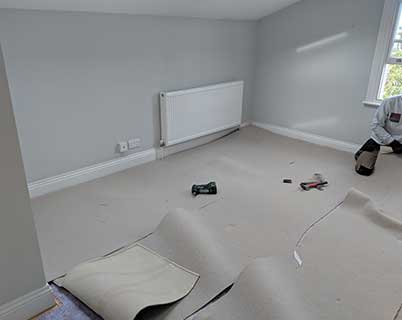
Removing the carpet to expose the subfloor
![]()
We laid the chevron parquet first and then filled in the single row border
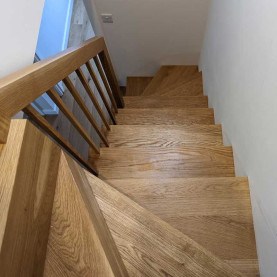
We have perfected our own specialist method of fixing wood to stairs, so the structure of the staircase remains in place. Removing parts of the staircase is never a good idea, as it’s integral to the structure of the building. We removed the old nosing from the stairs to create a flat surface and were then able to insert the wood flooring, using our tried and tested method, so it looks like the spindles are sitting on top of the wood. This gives a really clean and neat finish and makes the flooring look like it’s part of the stairs.
![]()
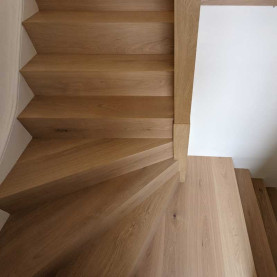
Lots of cuts were needed to get the detailing right leading up to the stairs

The stairs have been clad in matching oak with the oak sitting under the spindles
We also renovated the two sets of stairs. They were in very bad condition as the soft pine wood was dented, cracked, stained and had several layers of paint on them. After removing the carpet we strengthen and sanded the steps, stringers, and spindles, before applying two coats of primer and two coats of white Farrow & Ball floor paint, which is extra durable.

Sanding stairs renovation

White painted stairs with white spindles
This floor had to be very carefully designed, as there were so many different factors to consider. Every project is different, so as always, we assessed the conditions and then discussed the best design and fitting options with the homeowner.
In this instance, the alignment of the floor was taken from the centre of the bedroom door. Despite the uneven walls, which made the work more challenging, we were able to produce a very high standard of work. We also had a curved wall to work around and as the design of the floor featured bevelled edges, we had to be careful not to remove this detailing when sanding the floor.
![]()
We started by aligning the floor with the middle of the door
![]()
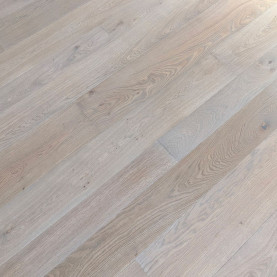
We were careful to retain the bevelled edge of the boards
We completed the job in stages as the homeowners were living in the property throughout the project. We understand how disruptive it can be to have workmen in your home, so we are always considerate and mindful of this. Furniture is either removed or carefully protected, and we tidy up thoroughly at the end of each day.

We always cover fitted furniture to protect it
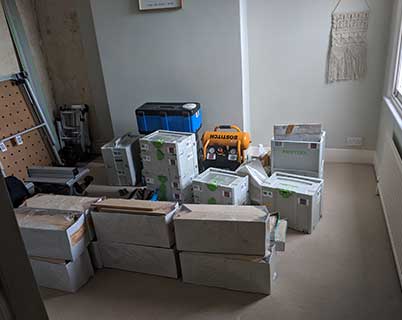
A clean and tidy working space
We are meticulous when it comes to the finer details. If just a small element of the flooring isn’t right, it will really stand out. To get the best possible finish for this job, we used a smaller hand sander to remove any fine scratches. The light helps us to see which areas need a little extra work. We are also careful when it comes to mitred corners. We like to follow the shape of any fitted woodwork, including architraves, so the floor’s border repeats the same pattern. This makes it look as if everything was installed and considered at the same time.

The final sand with a very fine sand paper helps to eliminate the tiniest of scratches

Small cuts, with mitred edges for a really tight, professional fit
The new chevron parquet floor and the single row border were finished with two coats of Osmo Wood Wax in a dark ebony shade and then a final coat of clear Polyx Satin. The project took the Fin Wood team three weeks to complete.

Applying the dark wood stain
![]()
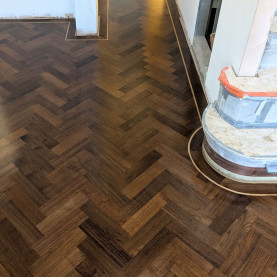
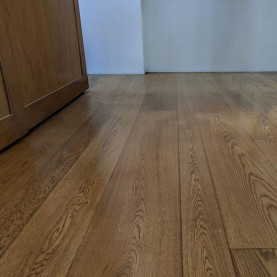
The ebony finish gives the wood a wondrously dark colour

The freshly oiled floor
Location: Wandsworth, London
Please sign in first.
Sign in