
Floor Levelling Explained: An Expert Guide

Wonky, uneven and sloping floors are a common feature in older properties and so we often get asked how to level an uneven floor for wood flooring. The most cost-effective method depends on the construction of the subfloor. In older properties with wooden joists (suspended floors), we tend to strengthen the joists with new wood joists. In properties with concrete subfloors, it’s a case of levelling out the higher areas and filling dips with a latex self-levelling compound. For us, a full site visit is the starting point for all of our wood flooring work. We have many years of experience in fixing and repairing both types of uneven subfloors, which we’ve explained in more detail here.

The uneven floor with original pine floorboards

Floor levelling on concrete floors
How To Level A Floor In An Old House
What causes sloping, uneven floors in old properties? In most cases it’s because the houses were built without foundations. This issue is exacerbated in London as the houses often sit on old marsh land, so as the ground settles it causes the bricks and walls to move too. Further problems can be caused if the subfloor is overloaded, which will happen if a partition internal wall is built incorrectly and is too heavy for the joists, causing them to bulge.

Covering up and protecting the furniture is always our first job

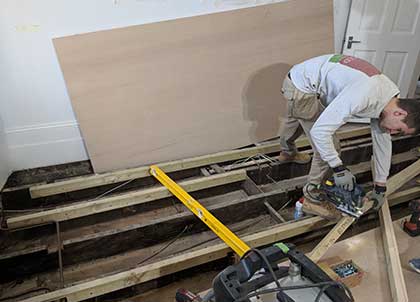
Removing the old pine boards reveals pipes, wires and uneven joists
This project shows our work levelling and strengthening the subfloor in a Victorian property, where we fitted a new wooden floor in the living room, hallway and open-plan kitchen. On length of 3 metres, the floor level dropped by with a 7 cm difference. The worst situation we encountered was a staggering 17 cm drop on a 10m length.
In this scenario, the best method is to sister the joists with new wooden joists. This allows us to level out the floor and compensate for the lower areas. The new joists are screwed and glued to the existing joists, to create a stronger, more stable and level subfloor. A good quality plywood is then fitted to the joists and then the wood flooring is installed on top of this.
Sistering the joists with strong, new timber

Working on an open floor with cleaned out cavities
Once the existing floorboards are removed, we are able to clean the area between the joists. Our team have to be extremely careful when working with an open floor. With only plasterboard protecting the ceiling below, we have to work slowly and carefully to avoid any accidents and damaging the ceiling.

The new joists with good quality plywood on top, ready for the new wood floor
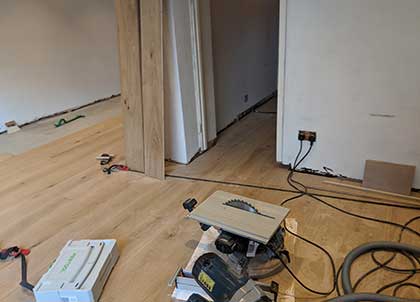
New engineered oak floor being fitted
How To Level A Concrete Floor
Floor level issues can occur with concrete subfloors too, as seen in this garage conversion. The concrete subfloor was made from different sections, with varying levels, so we had fix this before we could install the new hardwood engineered floor.
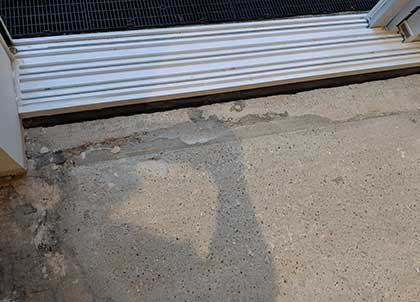
Before, the old concrete floor is uneven with large gaps by the french doors

After, the new wooden floor on a level floor, fitted tightly to the doors
We used a grinding machine to remove the bitumen left by the old parquet block floor and then marked out and ground down the higher points to even out the levels. All cracks were repaired and sealed. The floor was vacuumed before applying Aredx DPM IC, an epoxy liquid Damp Proof Membrane (DPM).

Grinding the old bitumen from the concrete floor
Now the floor is flat the DPM can be applied to seal the concrete
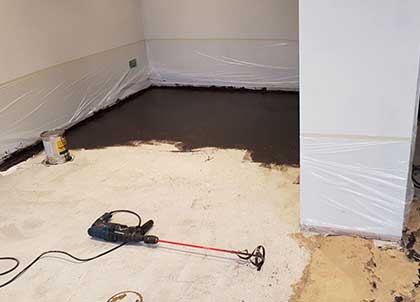
Once dry, Arditex NA, a latex based self levelling compound, was applied. A water based product would have taken a month to dry, but this quick drying latex formula was cured in just four hours, allowing us to fit the new wooden floor safely after 6 hours. We often recommend this product as it can go up to extreme thicknesses of 10 cm and much more with added aggregate.
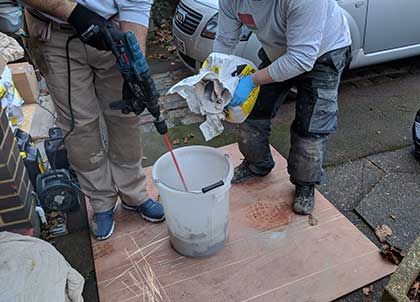
Mixing the Arditex on site

Applying the self levelling compound on top of the DPM
Before fitting the wooden boards, we checked the levels again to ensure the surface was even. Any slightly higher areas were ground down. The new floor was then ready to be installed on a solid, flat subfloor.

Applying the latex, the walls are protected against splashes

Ready for the new wooden floor to be laid on top after only 6 hours
If you are considering a new wooden floor but are concerned about the condition of your subfloor, please get in touch to arrange a site visit.


