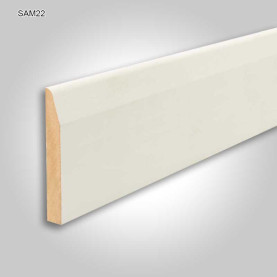
Skirting boards alternatives
#CraftedForLife
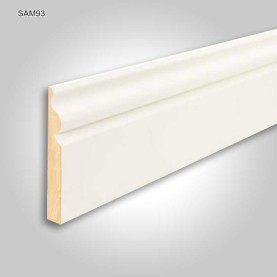
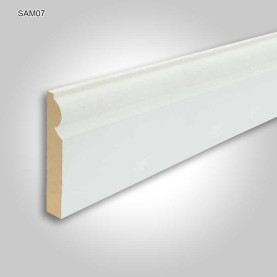
The skirting board is a key element which links the new wooden floor with the wall. It is meant to cover the expansion gap of the floor and to protect the walls from anything that might damage them.
New skirting

New Skirting fitting
After the floor installation is finished new skirting boards will be fitted. In theory everything should match seamlessly but in practice things are quite different.
First of all a skirting board is a piece of MDF or wood which is straight but in 99.99% of the cases the walls and the sub-floor are not, and if the sub-floor is not perfectly levelled also the new wooden floor will not be. This leads to various gaps on top of the skirting (against the wall), under the skirting (above the wooden floor) and also some minor gaps might occur at the ends.
Well, you might think that all is lost. It isn't, because after fitting comes the second stage which belongs to the painter which will apply wood filler and caulk after which will sand and paint it.
So the gaps resulted in the first stage when fitted will disappear in the second stage when finishing.
Sometimes there is already an old skirting in place which has to be removed to be replaced. When removing some damages may occur to the upper visible part of the wall. The size affected depends on the state of the plaster but usually the damages are kept to a minimum.
Undercutting
This alternative is mostly used when the skirting boards cannot be changed but the end result should match the one obtained with a new skirting.
It consists of cutting and removing a bottom piece of the existing skirting board so to obtain an exact gap to insert the new wooden floor under.
The process is time consuming and requires constant care during cutting to obtain a neat result and also to avoid damaging cables or pipes hidden behind. Still there is a risk to touch them with the blade if they are situated right against the board.
In some cases the skirting is less then 90mm thick and if the new wood is 20mm thick the remaining piece of skirting will be quite small. For this is recommended to replace the skirting.
When undercutting the skirting some chipping may occur and also when inserting the wood under the skirting, especially the last piece of wood, so a touch-up of paint an maybe filler might be required after the job is completed.
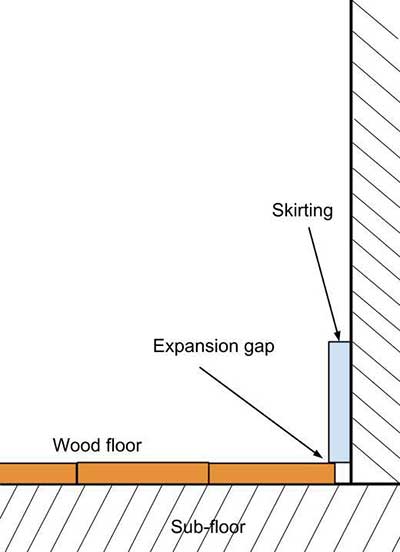
Undercutting the skirting
Scotia Beading

Scotia beading not recommended
Massively used for the majority of wooden floors but now is rapidly declining. It may be used when the skirting is already in place and will not be changed and also the undercutting method will not be applied. The resulting expansion gap in between the new wooden floor and skirting will be covered with a scotia beading which I do suggest to be the same colour with the skirting.
In my opinion this option should be avoided as much as possible as it will make the floor to look like a DIY job or a hasty one.
The beading is coming only primed and will need the work of a painter to finish it.
MDF strip overlay

MDF strip overlay not recommended
It is basically the same approach as the scoatia beading but a bit more disguised. It may be used when the skirting is already in place and will not be changed and also the undercutting method is not chosen. The resulting expansion gap in between the new wooden floor and skirting will be covered with a strip of MDF fixed over the skirting boards.
This solution allows to use 9mm thin MDF which has to be cut on site from MDF sheets. The result is much neater than using scotia beading but has the same disadvantages of increasing the distance from the wall to where the furniture can be placed and also when the skirting will be replaced eventually a new MDF strip will have to be used once again since the floor was cut previously in front of the skirting boards.
Shadow Gap
It is called so, shadow gap, because of its low height which does not allow to much light to get in, thus a shadow is masking the bottom end of the recess. It eliminates the necessity of skirting at all for covering the expansion gap of the wooden floor since this will end inside the shadow gap. This solution is mostly used for design purposes giving the impression of walls disconnected to the floor, which looks wonderful. To achieve this finish thoughtful planning has to be undertaken right from the first drawings of the building process. This because the walls need to be built in such a manner to accommodate the bottom recess gap, shadow gap. For the daily life this solution isn't that practical as it requires a lot of care for the bottom side of the walls which are vulnerable to be damaged by accidental hits or to get dirty through friction with various objects. Also it demands more attention when cleaning.

Shadow gap wood floor installation
Simple joint of the wooden floor with walls

Flexible floor sealant
It looks wonderful, very clean and simple, yet it is the least used and recommended as an alternative to skirting. This approach consists of installing the wooden floor with a reduced expansion gap and the sides precisely cut to an accurate line parallel with the wall. Then the small expansion gap is filled with a flexible filler designed for wooden floors which will absorb the floor horizontal movements. There are some restrictions when approaching this type of perimetral finish for hardwood floors: works only with high quality engineered wood, otherwise due to the high expansion ratio the floor may fail and it cannot be used for big surfaces, once again due to expansion. In terms of practicality it falls behind the other alternatives since the bottom side of the walls is exposed to potential damages and during the years the filler might need to be replaced as it is flexible and can be easily damaged. Yet it looks wonderful.

